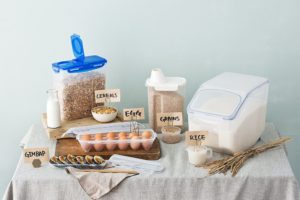

According to the EPA, over 40% of greenhouse gas emissions are directly related to a combination of transportation and manufacturing, meaning that the food we buy from the local grocery store, which is nearly always packaged and/or grown somewhere else and shipped by truck, arrives at a withering cost to our environment. In the past, we’ve revealed lots of ways to cut back on greenhouse gas emissions, from dehydrating foods to solar energy solutions. Now, we want to take the food conversation to the next level: Canning and how to put together canning kits for your home.
Home canning offers more sustainable options as regards food storage and eating habits than buying similar products off of a grocer’s shelves, with the added benefit that you know exactly what’s going into your food. Don’t like preservatives and chemicals in your food? Neither do we, which is why we have such a passion for home canning. In a world where ‘organic’ can cost double what you pay for ‘conventional’, canning also makes good financial sense.
Contrary to popular assumptions, the process of home canning is actually not all that terrifying. While there are indeed a lot of ‘moving parts’, and a few hard-and-fast rules for food safety, once you’ve assembled your cache of canning supplies, a bit of ‘canning for beginners’ advice, and a few inspiring recipes, you’ll be on your way to cupboards full of tasty, healthy, peak-harvested treats that will last far into winter.
While the plethora of canning equipment available can seem overwhelming, we’ve got you covered for the best advice on the home canning supplies you’ll need to start preserving your food today.
Where to Start
You’ll need to decide first whether you want a Water Bath Canner or a Pressure Canner, and the answer to that will depend entirely on what types of foods you intend to preserve. The rule is pretty simple: a 10-15 minute bath in a vat full of boiling water (212 degrees) is all that’s needed to safely preserve foods higher in acid, such as fruits, jams and jellies, salsas, and pickled vegetables, while lower acid foods – like un-pickled veggies, all animal products, and baby foods – require the much higher temperatures of a Pressure Canner. Got it? Fabulous! Now let’s look at what’s out there.
Canning Basics 101 – Building Your Canning Kit
While you can certainly spend an entire paycheck (or two!) on extravagant and expensive canning supplies, the truth is you can compile your canning kit fairly affordably. Listed below are a few options, dependent upon your own budget and needs.
Full Canning Kits, for those starting entirely from scratch:
Canning Kits – Water Bath Method
Bernardin Canning Starter Kits
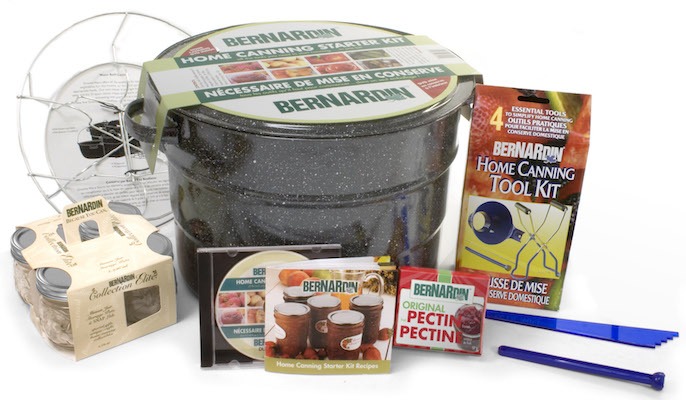
With a 21 quart capacity, this baby will handle up to 7-quart jars and comes with most of the needed accessories (canning rack, jar lifter, funnel, lid lifter, bubble remover/headspace gauge), as well as 4 jars with lids, a packet of pectin and an instructional DVD. Since many beginning home canners stick with pickles and jams, this canning kit may be all you ever need.
Granite Ware Enamel-on-Steel Canning Kits
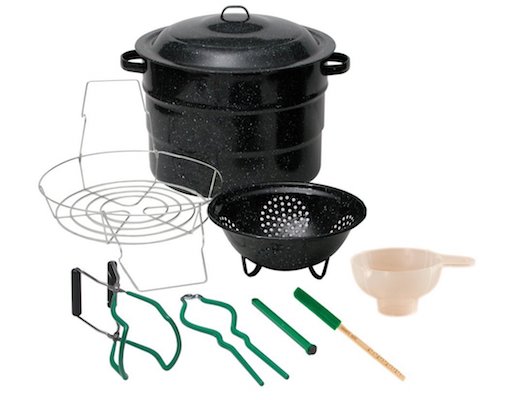
At around $30, this 9-piece canning kit includes a 21-quart canner, canner lid, 7-jar rack, 9-inch colander, lid wrench, funnel, tongs, jar lifter, and magnetic lid lifter, and is considered a Best Buy for beginning canners on a budget.
Canning Kits – Pressure Canner Method
Presto Pressure Canner and Canning Kit
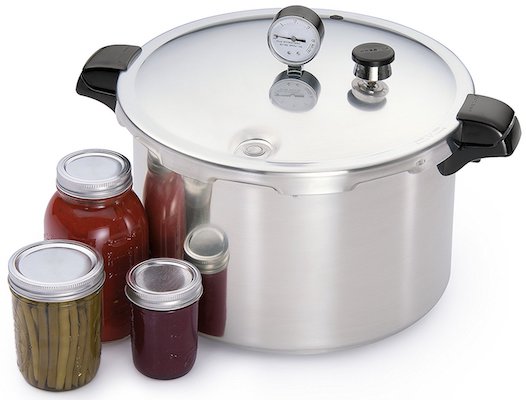
At just under $100, we still consider this Pressure Canner & Canning Kit Bundle a Best Buy, since it can be used for both low-acid and higher-acid foods. While you can certainly spend much more ($200-400), this kit offers a workable 23-quart size as well as a must-have assortment of gadgets.
Fagor Stainless Steel Pressure Canning Kits
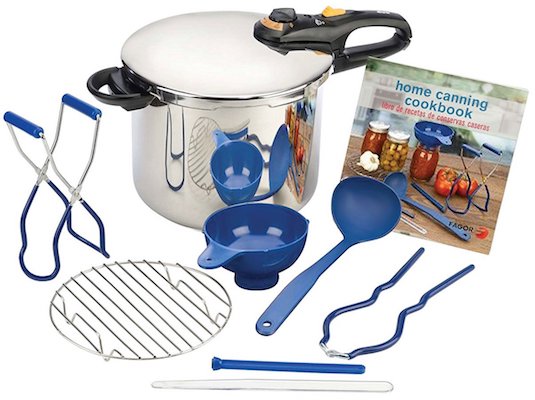
A bit more expensive than the Presto, the Fagor may also be used as a pressure cooker. The set includes the 10 quarts, 18/10 stainless steel Pressure Canner, Home Canning Cookbook with recipes, Pressure Cooking Booklet with recipes, Canning Rack, Funnel, Ladle, Jar Lifter, Jar Wrench, Bubble Freer, Magnetic Lid Lifter, and instructional DVD on how to use a pressure canner. Again, pressure canners can be used for both low-acid and higher-acid foods, so while they cost 2-3 times what a water bath outfit would set you back if you’re going to preserve more types of foods than just jam and pickles these canning kits are well worth the investment.
Canning Basics 102 – Gadgets
So let’s say you don’t need a canning pot. Many people already own a large stockpot or cherish a banged-up canning pot inherited from their parents or grandparents. Great! You’ll need only purchase a few extra doodads to make your kit complete.
Racks
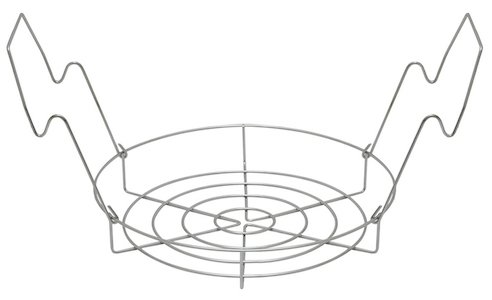
These keep the jars from coming in direct contact with the bottom of the canning pot, which could cause scorching. At just $6-8 bucks a canning rack such as this one is an absolute necessity for your canning supplies cache.
Funnels
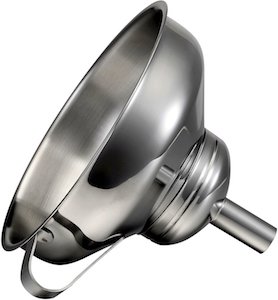
These little guys will prevent your canning area from becoming a sticky mess, but perhaps more importantly they’ll help keep the rims of your jars extra clean. Available in both plastic and stainless steel versions, these are a must-have for any canning equipment set-up. Make sure you have both the wide-mouth and narrower versions. Depending on how involved your canning project will be, it may behoove you to invest in a multi-funnel or combo set that includes different opening sizes to fit each type of jar you may choose.
Tongs

Not the trusty kitchen variety you use every day, rather a ‘grabber’ style tongs designed specifically to grip lidded jars. These allow you to lift jars from boiling water baths without burning your little fingers.
Magnetic Lid Lifters
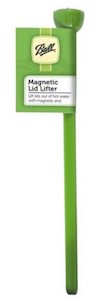
Akin to tongs, a magnetic lid lifter such as this one from Ball also allows you to lift the metal jar lids (which also must be sterilized before use) out of the boiling water without burning yourself. You may consider this piece to be optional, but lids and rings must be completely sterilized before use, and while you can easily fish the rings out with, say, the handle of a wooden spoon, the flat, slippery lids are another story altogether. For us, anything that makes the process less frustrating is well worth it, especially when the solution is so inexpensive.
Jars!
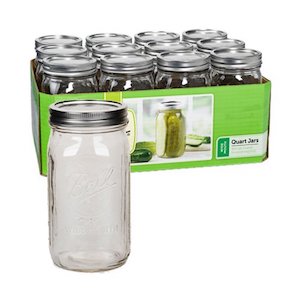
Ball Mason Jars – or Ball Jars as they’re often called – are the industry standard for all types of canning. Most consider them the best canning jars on the market today. The size and shape of the jar are usually determined by the food you’re putting into it. We love the pretty ‘tulip’ shaped jars for jams and relishes, whereas straight-sided jars work best for stiffer items like pickles. Tall, graceful glass cylinders from Weck are a nice way to preserve long green beans and asparagus, while teensy little 4-ouncers are perfect for gifting and party favors. We have an entire shelf in our storage devoted to canning jars in different sizes and shapes, for whenever a surprise fruit or veg trove of any size finds its way into our kitchen (see ‘Small Batch Canning’** below).
Lids and Rings
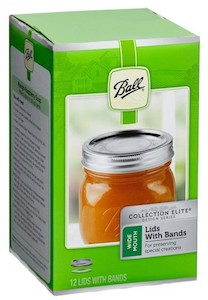
Must have – just be sure you’re getting the correct size for the jars you own. This, and the rings that hold them in place, will eventually be your only reoccurring costs.
Pectin or Pectin Alternative
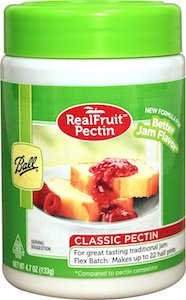
Traditionally, canning enthusiasts have used an element called pectin to help thicken preserved fruits and juices. Pectin is already in a lot of the things you’ll want to can, like lemons, grapes, and berries. However, as new studies suggest that commercially produced pectin is filled with GMOs, many have expressed a preference for pectin alternatives (like adding a grated green apple to your batch of jam), or a more natural pectin product. Whichever method you choose, you’ll nearly always find what you need with a simple online search.
Should you be interested in making your own pectin in your canning process, follow this link to a how-to make your own pectin recipe.
Canning Gadget Sets
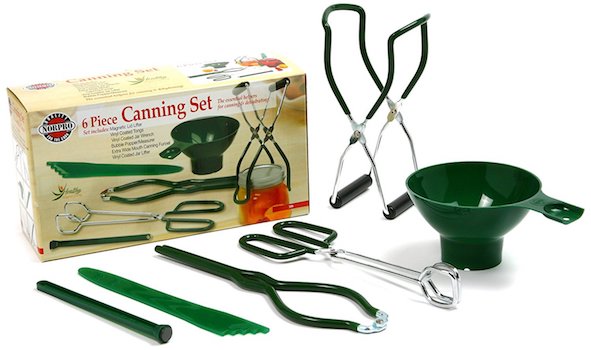
If you need to purchase all of the above, you can always pick up a sweet little starter kit for around $12-15, then purchase higher quality components as you go along.
Scoop
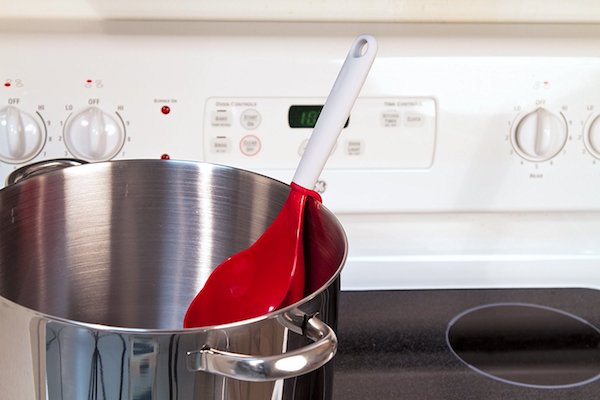
Okay, why would you need this if you already own a ladle? The answer is because this one, with pour spouts on each side, an angle that gets right down to the bottom of the pot, and a handy-dandy little clip that lets it sit on the edge of the pot, is way cooler. 😉
Strainers
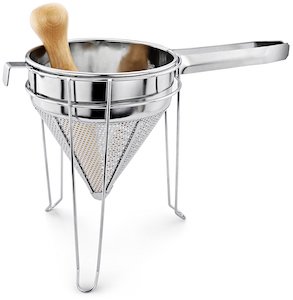
We wouldn’t personally consider a jelly strainer to be a ‘must have’, but if you cannot bear seeds in your jam, or are a jelly enthusiast, by all means, grab yourself one of these. A stainless steel strainer – or Chinois if you’re fancy and French – is a wonderful tool to have in your kitchen for other applications as well, including straining custards, gravy’s, sauces, and soups, so don’t balk at getting a nice one. Do get the set that includes the stand and fitted pestle, as the stand fits directly over the pot or bowl you’re straining into and the pestle is kind of a spindle that reaches all the way down to the squishy bottom, for a better jelly-to-wasted-bits ratio. A decent set that will last for years can be had in the neighborhood of $30, so it’s certainly an addition worth considering.
Canning Labels
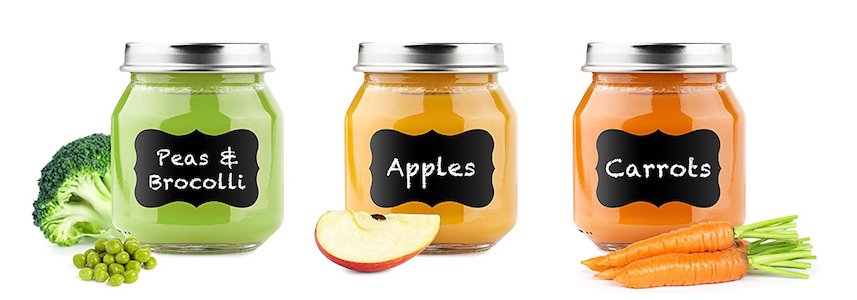
Last, but certainly not least, you’ll need to label your final products. The least expensive are paper (including a ‘dissolving’ variety meant to be easily removed), which can be written on by hand or run through your printer. There is also darling cardstock hanging tags, as well as vinyl ‘chalkboard’ stickers that can be written on with a while ‘chalk’ marker which we find so charming we now rarely use anything else.
Books on How to Can Food
Oh, the abundance! A quick Google search for books on canning reveals over 1,400 available titles, which can be a little mind-boggling by anyone’s standards. Our advice is to get one basic, comprehensive book from a trusted source – the Ball Complete Book of Home Preserving should do the trick – then fill in your collection with newer and more innovative volumes that explore modern approaches and complex flavor profiles, like Not Your Mama’s Canning Book, DIY Canning, or our current fav Food In Jars**, which introduced us to the concept of canning just a jar or two of anything we have in overabundance.
Ingredients
Canning fruits and vegetables you’ve grown yourself will of course reduce your carbon footprint tremendously, but not all of us have the time, energy, talent, or inclination to garden. Your neighborhood Farmer’s Market is an excellent option as the food will be both local and in season, and usually organic. There are also CSA (Community Supported Agriculture) subscriptions available in some areas wherein a box full of fresh, locally-grown produce is delivered to you once a week during the growing season. We started our very first ever subscription last year and couldn’t be happier. Click on the blue link above and type in your zip code to see what’s available in your area.
Other Popular Food Preservation Techniques
Food waste is a very large problem, especially in America. Americans lead the world in food waste. It is estimated that about 50% of all produce in the United States is thrown away. This percentage is closer to 30% on a global scale. That is approximately 1.3 billion tonnes worth of food wasted (about $3 trillion USD in value). Anything we can do to preserve our food so it doesn’t end up in the trash will help reduce this waste.
There are a wide number of modern day techniques and machines that help us preserve food and store abundance for later.
Most Popular Food Preservation Methods:
- Drying
- Freezing
- Cooling
- Canning
- Pickling
- Heating
- Boiling
- Smoking
- Vacuum Sealing
Canning Recipes
Below you’ll find some of our favorite canning recipes.
Easy Dill Pickles
Ingredients List
- 3/4 Cup Sugar
- 1/2 Cup Salt
- 1 Quart Vinegar
- 1 Quart Water
- 3 Tablespoons Mixed Pickling Spices
- 40 Medium Cucumbers
- 1 Bunch Fresh Dill
Steps to Make
-
Wash and dry cucumbers.
-
Combine sugar, salt, vinegar, water.
-
Tie spices in cheesecloth bag.
-
Add to mixture and simmer 15 min.
-
Pack cucumbers and dill sprigs into hot, sterilized jars.
-
Pour in the hot liquid pickling mixture, leaving ¼ inch of headroom.
-
Adjust the lids and bands, don’t over-tighten.
-
Process in boiling water bath 15 min.
Blueberry Maple Jam
Ingredients List
- 6 Cups Blueberries
- 2 Cups Pure Maple Syrup
- 1/3 Cup Lemon Juice
- 1 Tablespoon Lemon Zest (finely grated)
Steps to Make
-
Rinse berries well and place them in a large heavy-bottomed pot and crush slightly.
-
Pour Maple Syrup over the berries.
-
Heat over medium-high until syrup boils and berries begin to ‘pop’.
-
Funnel into hot, sterilized jars; wipe the rims clean, adjust lids and rings.
-
Process for 15 minutes in a hot water bath.
Other recipes to try:
The Process
After purchasing your canning equipment, gathering your ingredients, and settling on the recipes you want to try, you’re ready to start canning food!
- Read the recipe through twice before getting started. Seriously, take the time. This is the canner’s equivalent of the carpenter’s creed, ‘measure twice cut once’. A world of mistakes can be avoided with this simple step.
- Assemble your mise en place, which is just a frilly way of saying, ‘measure out all of your ingredients according to the recipe and put them on the counter in front of you’. If you do all of your cleaning, trimming, chopping, and measuring in advance the process goes much smoother, but this is also a great fail-safe against forgetting any key ingredients or steps in the heat of the moment.
- Sterilize your jars, lids, and rings. There are a number of ways to do this (we’ve seen Jamie Oliver heat his jars in the oven!), but the most commonly used method is also one of the easiest: Fill your canning pot with water, bring it to a boil, toss in your rings and lids for a few minutes, remove them to a sterile area (a plate or large bowl that has also been blanched in boiling water works just fine), then boil your jars a few at a time, pouring the water back into the pot as you remove them with kitchen tongs and set them on the clean counter to fill.
- Cook your ingredients according to the recipe.
- Fill your jars, remembering always to leave ¼ to ½ inch of ‘headspace’, to ensure enough room for the lid to pop in. Only tighten the rings enough to hold the lids on. Do not torque them down all the way.
- Process the jars in your canner according to the directions on your equipment as well as the appointed time the recipe states.
- Let cool completely on the counter before tightening rings or putting them away. As the jar’s hot contents cool a natural vacuum will occur, causing the lids to ‘pop’ down. This is why you left that ¼ to ½ inch headspace. Any lids that do not pop in should be placed in the fridge immediately and eaten as soon as possible.
- Store your completed jars in a cool, dark space until it’s time to use them.
- Enjoy the fruits of your labor well into winter!
Small Batch Canning
We mentioned small batch canning earlier, as we’ve recently learned the joys of ‘putting up’ a jar or two of jams or pickles pretty much any time we have more food than we can eat before it perishes. Can’t resist getting a full flat of berries? Bring ‘em home! What you don’t eat raw can quickly be cooked down with sugar and lemon juice into a delectable jam that you may then quickly process in a hot water bath or simply store in the freezer until you’re ready to use it. Last week we pickled all of the ‘leftovers’ from our produce drawers – half a head of cauliflower, a couple of limp carrots, the last few ribs of celery and thinly sliced rings of red jalapenos – which gave us two full jars of spicy Jardiniere to serve the next time unexpected guests drop by for cocktails.
Home canning is arguably a healthy lifestyle choice for you and is good for the environment. By producing and managing your own stock of preserved food you’ll be cutting back on your carbon footprint immensely, reaping the health benefits of a more plant-based diet, and engaging in one of the oldest and most enjoyable of kitchen activities, canning food!
Sources:
- https://www.epa.gov/ghgemissions/sources-greenhouse-gas-emissions
- https://www.nal.usda.gov/afsic/community-supported-agriculture#find
Susanne Robertson is a freelance writer living in Ashland, Oregon